Minimum Calibration
Once a tape recorder has been connected, a minimum calibration is required to ensure proper audio level alignment between the computer and the recorder. The calibration procedure is similar to using any standard media player app for recording a mixtape:
(1) Select and play a loud passage in the virtual album.
(2) Test recording on the tape for a short period of time.
(3) [Optional] Stop and rewind the tape (not necessary for a 3-head deck with off-tape monitor feature).
(4) Listen carefully to the recorded sound on the tape.
(5) While repeating the above steps (1 ~ 4), adjust the computer's audio output volume, or the tape recorder's recording level knob...
(6) and gradually tune up the recording level until distortion becomes noticeable.
(7) Slightly lower the recording level so that the distortion becomes just inaudible.
Note 1: User's experience in tape recording is a key to success.
Note 2: Watch the tape recorder's level meter for visual assistance.
Note 3: All the meters on the app's UI can be disregarded (as if they are non-existing).
Note 4: Please always keep "None" for the "Normalization", "Compression" and "NR Encoding" as they require "Advance Calibration" being done.
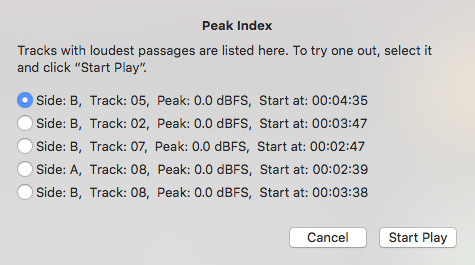
Note 5: Sometimes, it is not easy to manually find the loudest passages for testing, the app can help. Just open the menu item "File" > "Peak Index", the app will suggest up to 5 loudest passages out of all the audio files. To try one out, select it and click on the "Start Play" button. The test play will start from the beginning of the selected loudest passage, but will not stop at the end of the loud passage nor auto-repeat the loud passage. User may need to drag the progress bar to repeat it.